Below is a tutorial on the basics of batch processing product images for uploading to your Woocommerce store.
In order to compress the images after resizing, you will need to buy and install the Tinypng Photoshop plugin. Available here:
The instructions for installing the neccesary TinyPNG Photoshop scripts for automation are here:
https://github.com/tinify/photoshop-scripts
If you would prefer to create a batch process (rather than use the scripts– useful if you want to automate even more of this workflow), here’s a link to good step-by-step instructions on how to create an Action to batch process with TinyPNG Plugin:
https://forums.tumult.com/t/compression-of-pngs-and-jpgs/8088/3
The link to download the TinyPNG Photoshop plugin scripts you will need to install:
https://github.com/tinify/photoshop-scripts/tree/master/Adobe%20Photoshop/Presets/Scripts
You will only need the first three scripts from the download page.


If you would like to use the Photoshop resizing actions I created to do the initial resize processing of the images, first download my Nick’s Actions.atn file from Dropbox.
There are two actions in the file, one to convert images to 800×800 square, and one to resize an image to a max size of 1024 in either orientation (so you can see the difference in the two, the 800×800 resizes the canvas to make the finished image square, the 1024×1024 action does not).
Dropbox link to actions:
https://www.dropbox.com/s/36cryo6uehgtod1/Nick%27s%20Actions.atn?dl=0
To install the actions, follow this from Adobe:
https://helpx.adobe.com/photoshop/kb/migrate-actions.html
To create your own set of actions, check out this Adobe tutorial:
https://helpx.adobe.com/photoshop/using/creating-actions.html
Below is a screen cap of the order actions I recorded to create the two actions. The “File or folder not found.” warning under Open in each action is AOK. You will point Photoshop to the files during the batch process.

Before you begin the batch process, make sure all of the images you want to process are in one folder. Create a new folder for the destination of the process images.
In this example, I have the original supplied files at high resolution, in various formats (.tif, .jpg, etc.) in the SUPPLIED ORIGINALS folder.
*If you have layers Photoshop .psd files in your originals folder, you will have to add an extra step in the actions to flatten the layers right after opening.
The 800×800 folder will be my processed images destination folder.
Remember, all images in the folder will be processed, regardless if they are in subfolders. The original images will remain unchanged, the actions will create new versions.

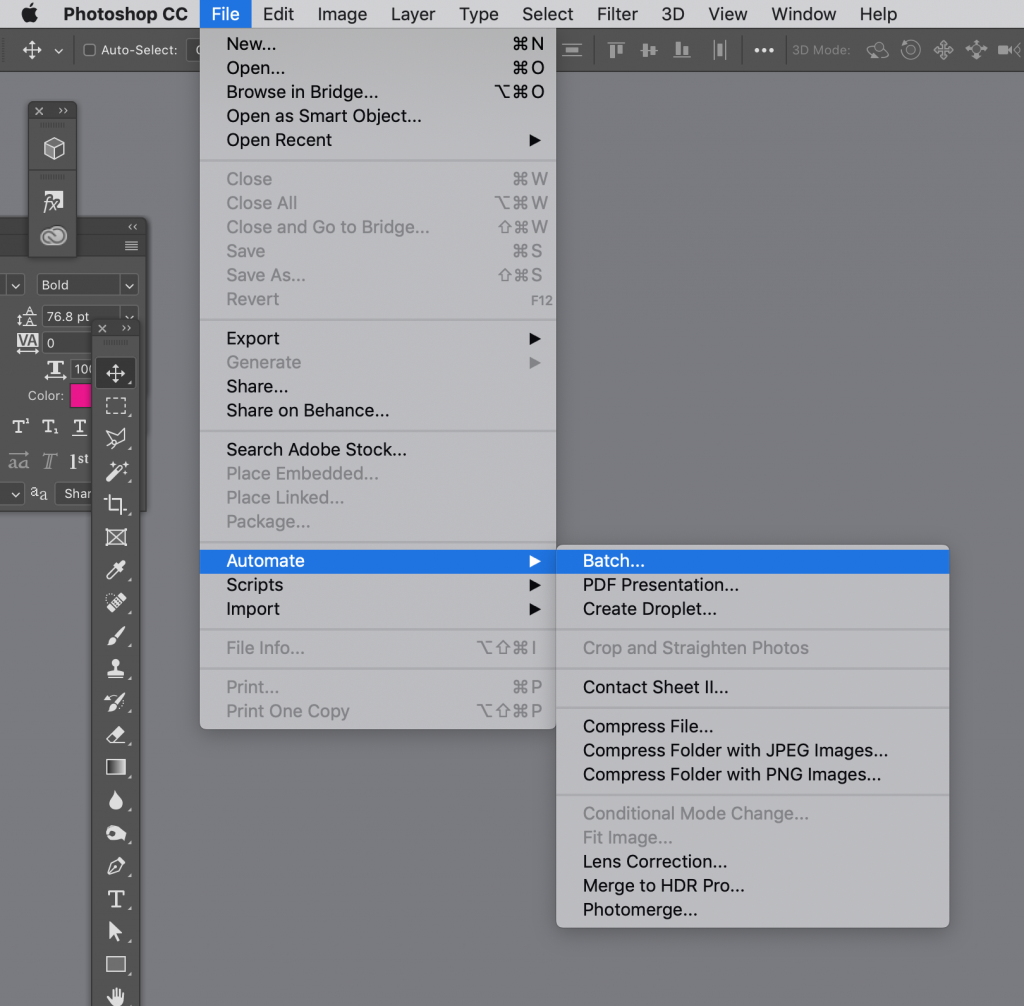
Once the actions have been loaded into Photoshop and your folders and original images are good to go, go to File>Automate>Batch to begin the batch process.
The Batch dialog window will open. Here are the settings I used in this example:
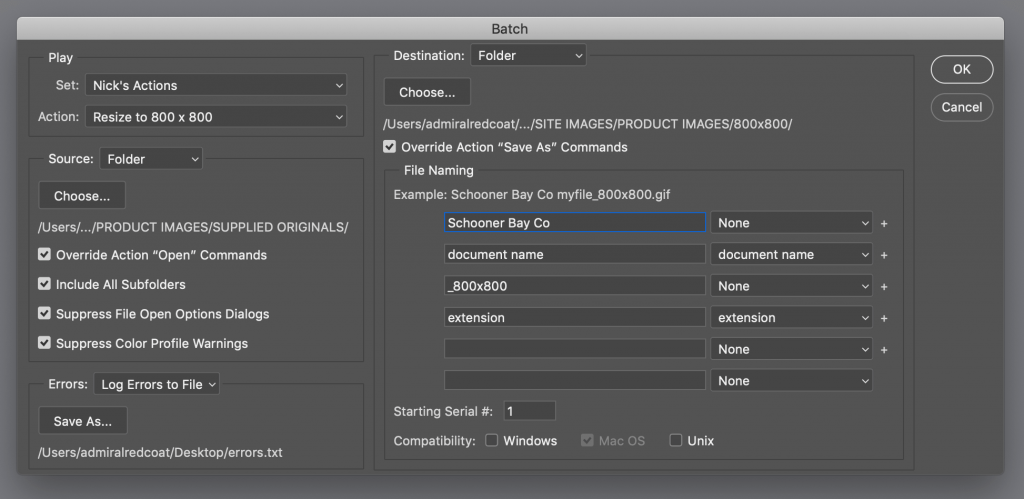
The source folder will be your original images. Check the boxes below the file path. You can set the error file destination, if you like. It is useful for troubleshooting.
On the right side, choose the Destination folder you created, Beside to check the Override Action “Save As” Commands to append the processed file names.
In this example, I wanted to add Schooner Bay Co as the first part of the file name, be sure to add a space, – or _ to separate the name from the rest of the file name information (otherwise it will all run together). I don’t need a space after document name (which is the original file name minus the extension). The _ in _800x800 will separate that part from the original file name.
You shouldn’t have to worry about checking any of the Compatibility boxes in this case.
No click OK and watch the magic happen. If you have a lot of images and they are large, you might want to separate the originals into batch folders (you can still use the same destination folder).
My original files folder in the case was 15.04GB, big and I processed the entire folder in one go. I just went and got a beer (or two), it took about 2 hours to process on my late 2013 MacBook Pro with 8GB RAM.
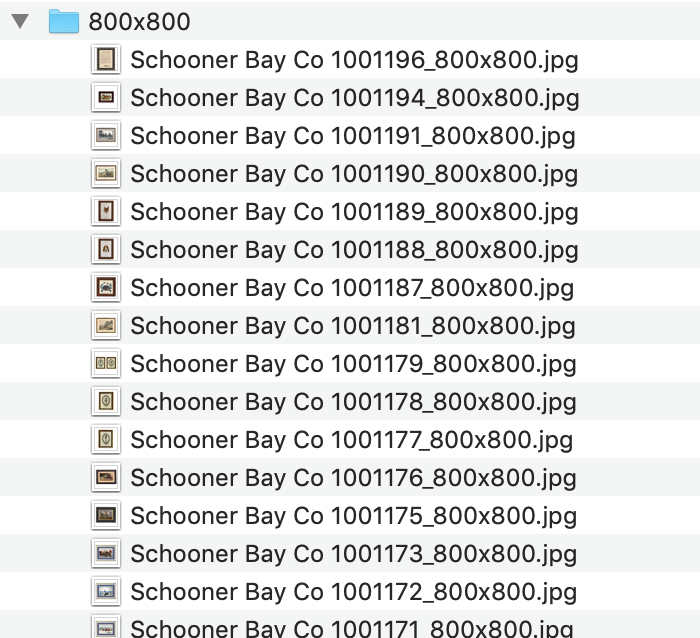
Below are the finished files vin the destination folder with their now more SEO friendly naming convention:
Now time to Tinyfy!
Once you have processed your images to 800×800, it’s time to compress them. Tinypng is the best compression I’ve found- it’s tough to tell the original from the compressed file.
If you are a nervous nelly and don’t want to take the chance of ruining all of that hard batch processing work- you can create a new folder for the images you are about to compress and append the 800×800 name with tiny, or whatever will hep you identify the difference. Then duplicate all of the images from the 800×800 folder in the new 800×800 tiny folder. If you don’t have the hard drive space, skip this and rejoice in the risk you rebel, you.

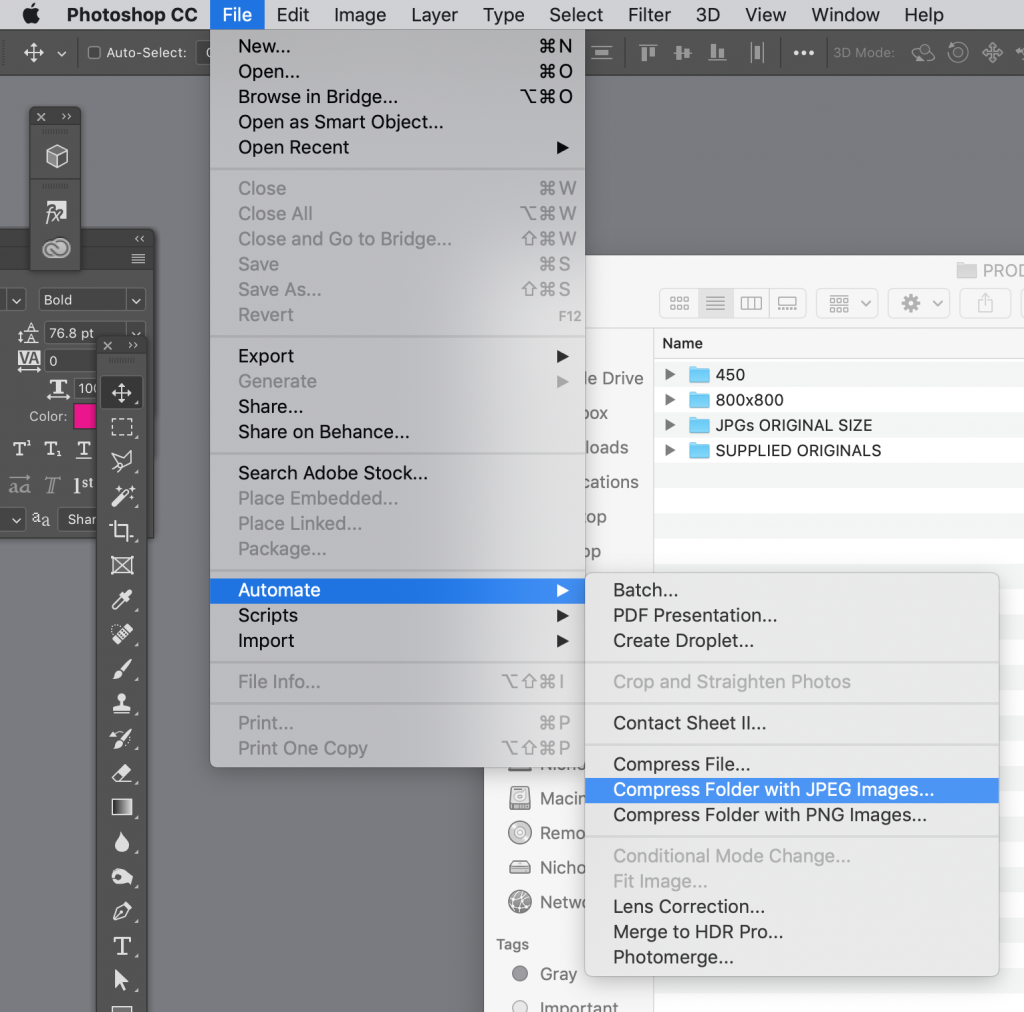
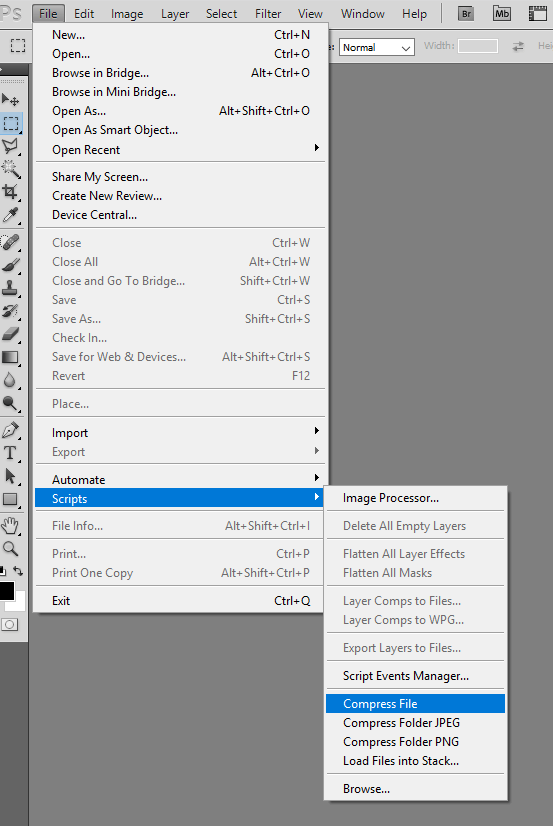
To begin the tinyfy batch process, go to File>Automate>Compress Folder with JPEG Images … (Mac) or Scripts>Compress Folder with JPEG Images … . We use this choice because when we ran the 800×800 action, it converted our processed files to .jpg format. How awesome is that?!
If you want to compress a single .png or .jpg file, choose the Compress File … option and then choose the file you would like to compress.
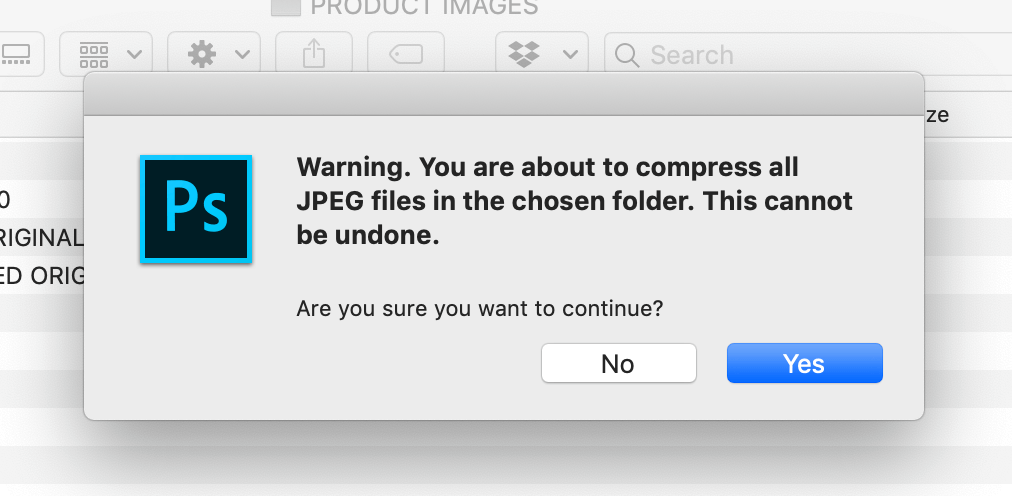
This dialog box will pop up. Scare tactics!
The Compress Folder with JPEG Images … option in Automation will overwrite the files in the chosen folder with the compressed version.
Click Yes to then choose which folder and files you are going to compress.
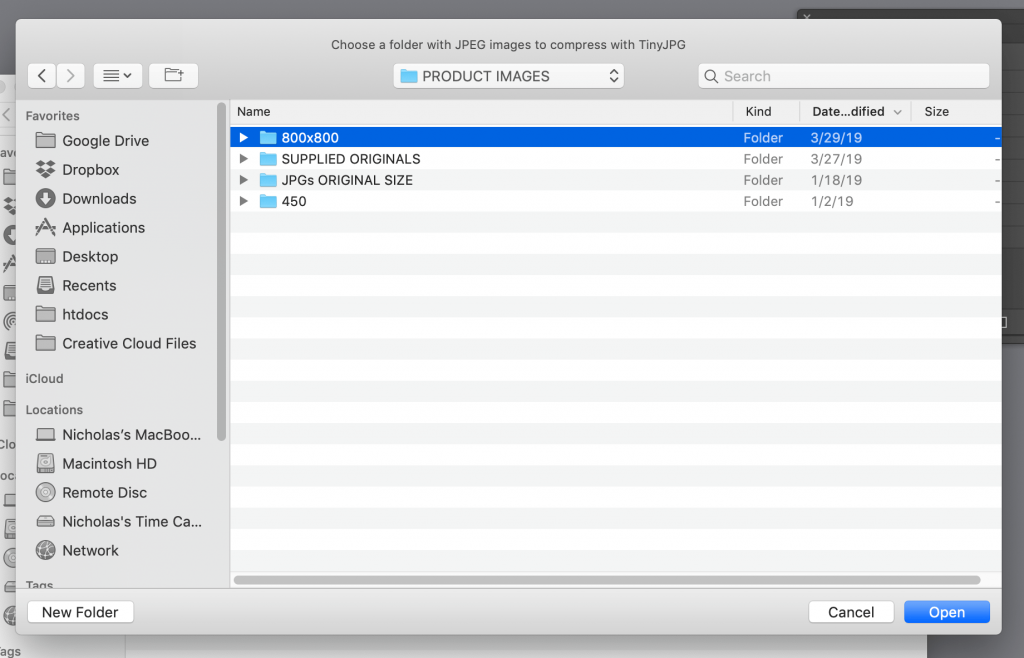
As I’m a rebel and didn’t copy my 800×800 images over to a new 800×800 tiny folder, I’m going to compress the 800×800 folder.
Choose the folder you want to compress and click open to begin the process.
If you have a lot of images, this could take a an hour or two (or more if you computer is slow).
From 58 KB to 15 KB, now that’s some space savings!

As an example of why this is important to do for the sake of your sites size and speed. Here’s the file size of the originals, the 800×800 processed images and then the tinyfied folder info. for comparison:

That’s some serious disk space savings!
